
Last Updated on November 15, 2022
In this post we will discuss in detail How to Mod Stabilizers. If you have ever experienced your keycaps shifting and vibrating when used you will feel annoyed and of course not comfortable using it to type. Everyone wants keyboard keys that are sturdy and stable when used. Of the various solutions available, modifying the stabilizer on your mechanical keyboard is the best solution to make your keys more stable and not wobbly.
In general, the keyboard uses a Cherry Style stabilizer which is proven to be easier to apply to a mechanical keyboard. There are several ways to modify Cherry’s stabilizer style on keyboard mechanicals, clips, lubes, and band-aid mods. The three methods are the Cherry style Stabilizer modification method to improve key balance, minimize vibration, and reduce sound on mechanical keyboard keycaps.
Before you make modifications to the keyboard stabilizer, you must first know the 5 mistakes that are often made when modifying the stabilizer. Let’s break down how How to Mod Stabilizers: Band-Aid, Clip, and Lube efficiently maximize the performance of the stabilizer that is installed on your mechanical keyboard. Let’s get started!
What are Mechanical Keyboard Stabilizers?
For a mechanical keyboard, stabilizers is used to balance the larger keys, such as Spacebar, Left Shift and Right Shift, Enter, Capslock. Besides being able to provide balance to large keys, the stabilizer also protects the plate from direct impact with your keycaps, this is very useful for mechanical keyboards that use plastic plates.
The stabilizer on the mechanical keyboard serves to muffle the sound of the keys, support the keys so they don’t sway or vibrate which will result in a better typing feeling. This is why the stabilizer is one of the (optional) components on the mechanical keyboard that must be used.
The most commonly used stabilizers on mechanical keyboards
There are three types of stabilizers in existence including Cherry Style Stabilizers, Costar Stabilizers, and Optical Style Stabilizers. Of the three types of stabilizers, Cherry Style Stabilizer is the most widely used.
For the Costar Stabilizer, it is very rare to find nowadays, because this is a fairly old type of stabilizer. You can find it on the old mechanical keyboard series. As for the Optical Stabilizer, you can find it on Razer’s mechanical keyboard.
In this article, we will discuss how to modify the Cherry Style stabilizer in detail. If you want to read the full article about the satbilizer, we have summarized it in full in this article.
Why Mod your Mechanical Keyboard Stabilizers?
Modifying the stabilizer on the mechanical keyboard aims to improve the balance of your keys so that you can use them comfortably and peacefully. Modifying the stabilizer doesn’t cost as much as changing keycaps, modifying the stabilizer is very cheap, but it has a huge positive impact on the mechanical keyboard.
The benefits that we get from modifying the stabilizer on the mechanical keyboard include the buttons becoming stronger and more balanced, minimizing the vibration on the buttons, avoiding the collision of the buttons with the PCB protective plate, reducing the sound of the mechanical keyboard buttons.
How to Mod Stabilizers
Tools Needed To Modify Mechanical Keyboard Stabilizer
There are several important tools that you must prepare to simplify all stages of your work when modifying the stabilizer on your mechanical keyboard. The tools needed don’t have to be expensive, they’re very affordable. If you have a Hot Swappable mechanical keyboard, you don’t need a soldering iron to open the switch.
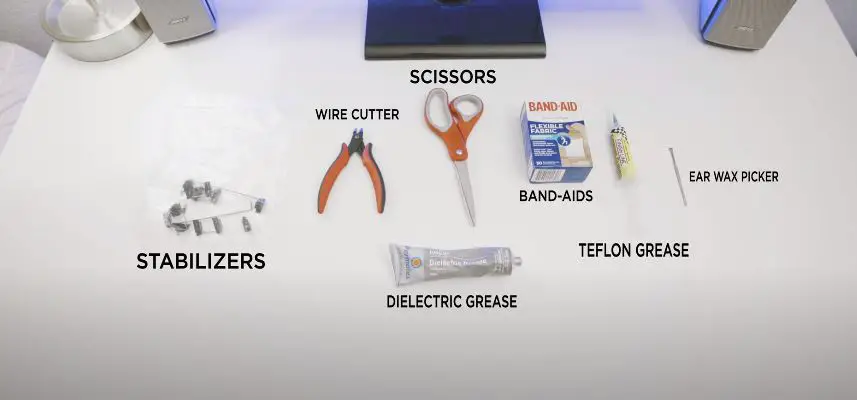
We strongly recommend that you do this on a dedicated workbench, don’t work on a messy and dirty desk. Here are the tools we need to modify the mechanical keyboard stabilizer:
- Keycap Puller: To remove keycaps from switch
- Swith Puller: To pull the switch from the PCB
- Soldering Tool: For soldering and unsoldering switches (For Standard PCB)
- Band-Aid: For coating the PCB on the part where the stabilizer stands.
- Scissors: For cutting some components
- Screwdriver: To install and open the screw
- Tweezers: To handle small objects
- Dielectric grease: For Stabilizer Lubing
- Small Brush: To apply lubricant to the stabilizer.
Prepare the Keyboard for Modding
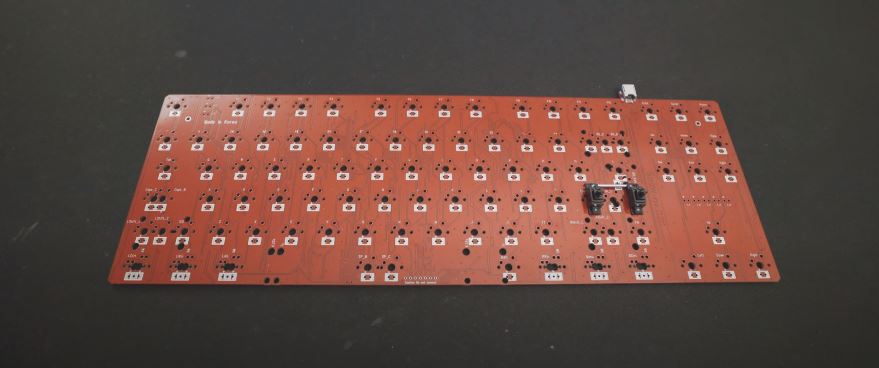
Prepare a mechanical keyboard whose stabilizer we will modify. You need to prepare by opening all the keycaps, switches, and stabilizers on your mechanical keyboard PCB.
1. Remove The Keycaps
When opening keycaps, open all keycaps that don’t have stabilizer first. Provide a place to put the keycaps that have been removed or sorted on your desk like a normal installed keycaps. If you open the keycaps with your fingers, we highly recommend the aluminum keycaps puller so you don’t rub your keycaps.
2. Remove the Switch from the PCB
Remove all switches that are attached to your keyboard’s PCB that have stabilizers. This is to minimize your work. Especially if your keyboard is not Hot Swappable, the soldering job will be a pain. While the hot swappable mechanical keyboard, you only need to remove the switch with a switch puller.
3. Remove Stabilizer from PCB
Release the stabilizer by pressing the small lever on the stabilizer and it will release automatically (this is for the stabilizer mounted on the plate). While the stabilizer is installed on the PCB you need to use a screwdriver to remove the screw.
The Band-Aid Modification on Mechanical Keyboard Stabilizer
This is the process of placing a band-aid on a mechanical keyboard PCB that will be occupied by the stabilizer. This aims to dampen the sound of the stabilizer and also protect the PCB from unnecessary impacts when the stabilizer is working. You only need to cut to the size of the stabilizer mount area and add a little Dielectric grease on the surface of the band-aid before placing the stabilizer.
1. Cut Band-Aids According to the size of the stabilizer holder
Cut the band-aid into small pieces about 6x3mm. Each stabilizer requires two band-aid pieces of the same size.
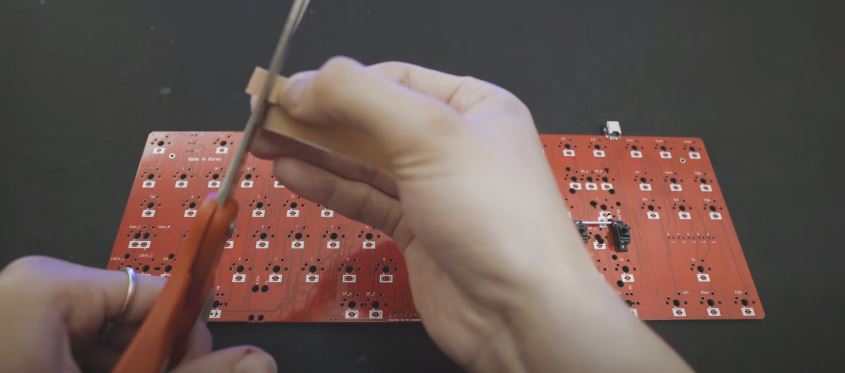
2. Install Band-Aid on PCB
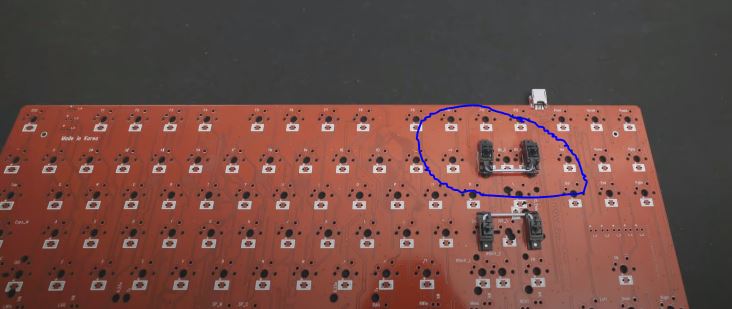
Install the band-aid on the PCB just below where the stabilizer will be installed. Make sure the band-aid is firmly attached to the PCB before you install the stabilizer.
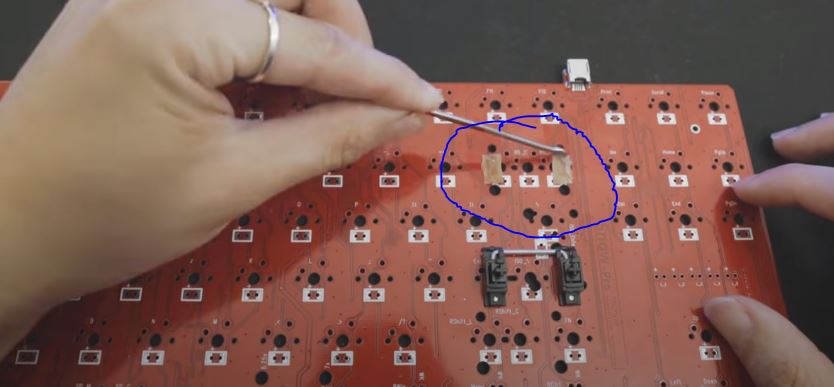
Apply Dielectric grease to the band-aid piece that has been properly attached to the PCB, then re-attach the stabilizer just above the band-aid piece that has been attached and given Dielectric grease.
You’ve done Band-Aid Modification on your mechanical keyboard stabilizer perfectly!
The Stabilizer’s Clip Modification
Pay attention to this when you do Mod Clip Stabilizer, don’t cut the stabilizer wrong, because this will damage your stabilizer. You just need to remove the bottom on the stabilizer insert.
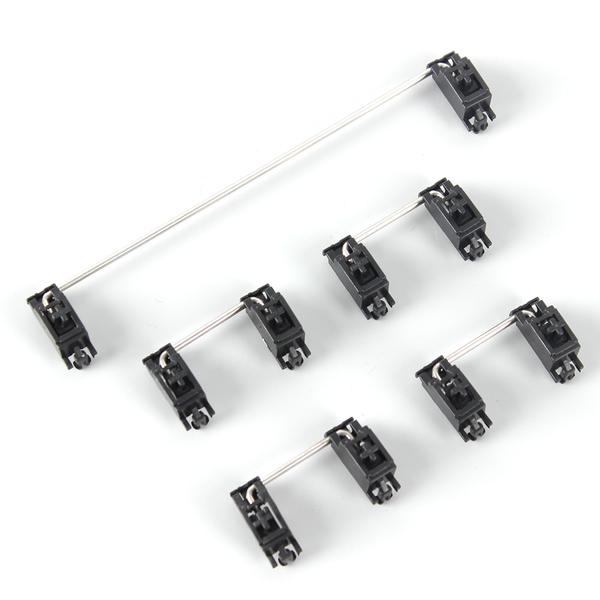
1. Take Apart the Stabilizers
First, open the stabilizer and separate each part as shown below:
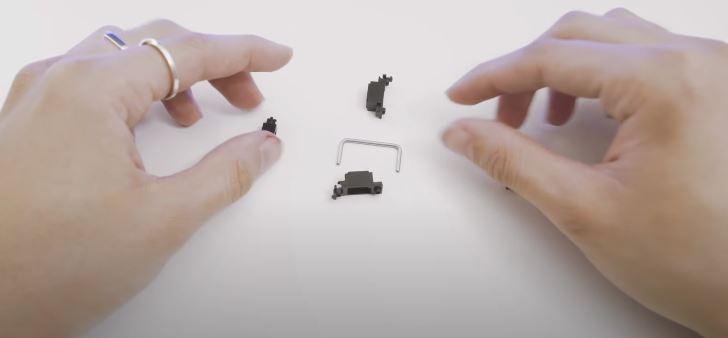
Remove all stabilizer components from the housing, remove the metal rods from the left and right stabilizer clamps.
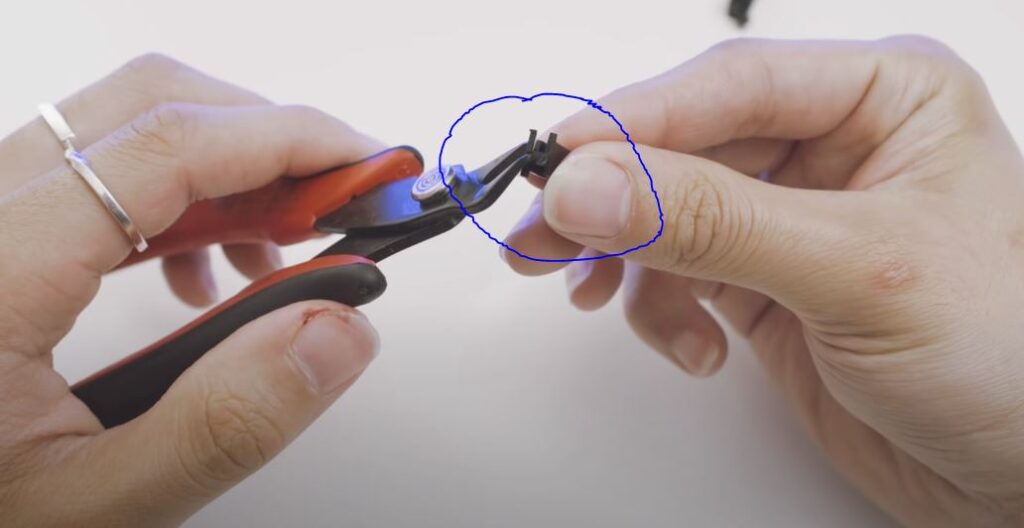
2. Clip the Stabilizer Insert
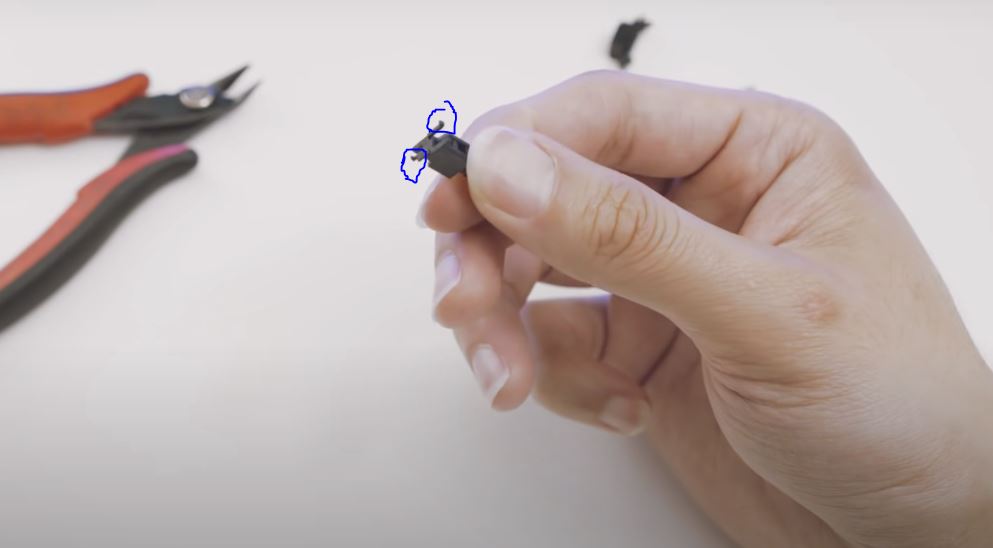
Next you have to be careful not to do the wrong thing when cutting parts of the stabilizer. What will be cut is the rectangular section on both sides that is located on the two stabilizer mounts located at the bottom. You only need to cut the inserts on both sides of the stabilizer mount.
When you have finished cutting according to our instructions, reassemble all components of the stabilizer to the housing. You’ve finished modifying the Clip on the stabilizer!
Stabilizer Lube Modification
Adding lubricant to the stabilizer components aims to make it more slippery to avoid friction between components. This will also protect the components on the stabilizer to make it more durable.
In addition to treating the stabilizer components, this will make the stabilizer movement smoother. What you need to do is lubricate the parts where the components move a lot, such as the mounting metal rods, stabilizer housing. You can do this using a small brush to apply the lubricant.
1. Lube the Metal Rods
Lubricate the metal stabilizer rod that will be inserted into the stabilizer housing. You don’t need to add lubricant to the stabilizer housing, just going through the metal stabilizer rod is enough. No need to lubricate it thoroughly, just evenly enough so that the lubricant does not fall on the surface of the PCB and the mechanical plate of your keyboard.
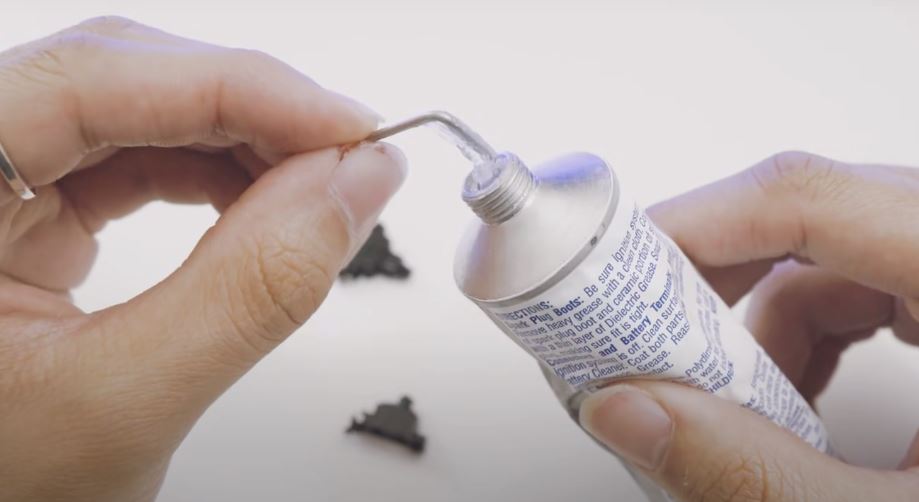
Lubricate both sides of the metal rods that will enter the stabilizer housing as shown below

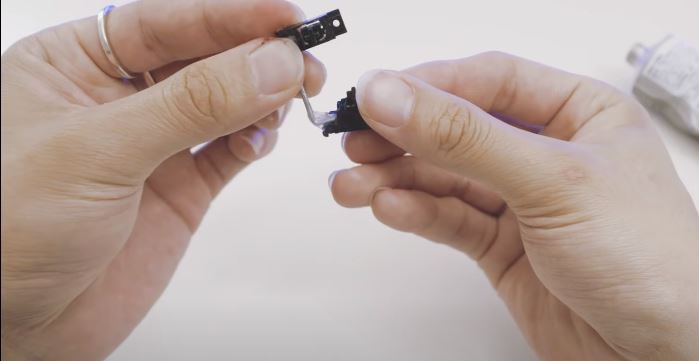
2. Reinstall all stabilizer components
Put the lubricated iron rod back into the stabilizer housing.
The last step is to re-install all the stabilizers that you have modified into the PCB. You can use the three modification methods above for all your keyboard mechanical stabilizers at the same time.
Next, Reinstall the switches, keycaps and all the components that you have opened, and get ready to feel the difference in your mechanical keyboard keys compared to before making 3 stabilizer modifications.
Read also:
How to lubricate the stabilizer using a toothpick
Lubricate the Switch without desoldering
Which is the best stabilizer mods?
The best stabilizer keyboard modifications are Clip and Lube. Both of these methods really provide significant changes to the stabilizer both in eliminating rattle, vibration, dampening sound, and balance buttons. Clip and Lube modification is the best choice to do on the stabilizer.
Modification of the stabilizer with band-aid is optional, but it’s also a very good thing to do because it can dampen vibrations on the keyboard keys and drown out the sound made when typing. Band-Aid can also protect the PCB surface from scratching the plastic from a hard-pressed stabilizer.
Conclusion
Modifying your Cherry Style mechanical keyboard stabilizer using 3 modification methods at once is the best choice to increase the stability of the keys on your mechanical keyboard.
You can also do one of these methods, because each modification method has a different purpose. Band-Aid modification is a modification that aims to muffle the sound of typing on the keys by attaching band-aid pieces to the PCB surface to which the stabilizer will be attached.
Clip modification is a stabilizer modification that aims to minimize the impact of plastic on the stabilizer housing with the plate or PCB surface. Therefore both sides of the rectangle are cut.
The last thing is to lubricate the Metal Rod mounted on the stabilizer housing, this is to help smooth the movement of the stabilizer to make it more slippery and smooth. Modification of lubrication on the stabilizer is also to avoid hard friction between the metal rods and the stabilizer housing, so that they are not easily damaged and rusty.
https://www.pinterest.ca/pin/625437467000541037/Kizaru is a fan, collector, and has a huge addiction to mechanical keyboards. Kizaru has a collection of dozens of mechanical keyboards that come in different sizes and use different switches. He also frequently contributes to various forums that discuss keyboards such as Reddit and GeekHack.
