
Last Updated on September 30, 2023
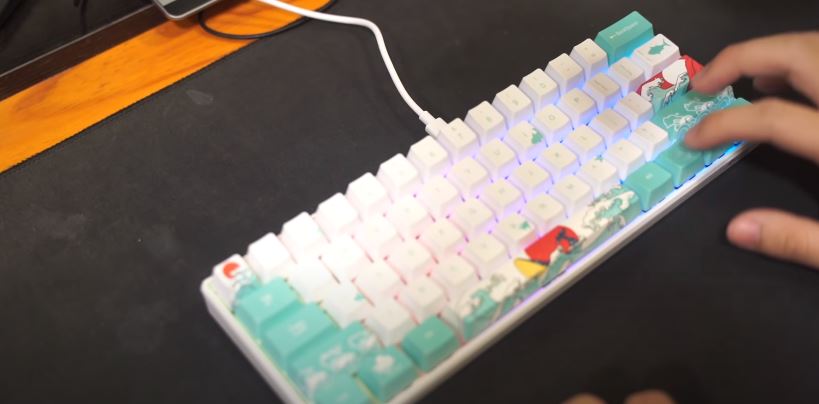
The Royal Kludge RK61, a compact and affordable keyboard with Bluetooth connectivity and RGB backlighting, has gained popularity in recent years. In this article, we’ll explore how to effortlessly elevate your Royal Kludge RK61 into a premium keyboard. We’ll cover various upgrades, from keycaps to switches and stabilizers, enhancing your typing and gaming experience.
How I Easily Upgraded Royal Kludge RK61 to A Premium Keyboard
Following are some of the things I did to upgrade My Royal Kludge RK61:
- Lubricating the RK61 Switches:
- Modifying and Lubricating RK61 Stabilizers:
- Installing Foam into the RK61 Keyboard Case:
- Replacing Keycaps:
Essential Equipment for Upgrading the Royal Kludge RK61:
- Royal Kludge 61 (White): Available on Amazon
- Coral Sea Keycaps: Purchase on Amazon
- Soldering Iron Tool Set: Buy on Amazon
- Krytox 205g0 (Switch Lube): Find it on Amazon
- Super Lube (Stabs Lube): Available on Amazon
To enhance the RK61 keyboard, several actions must be performed on all its components. Here’s a comprehensive guide to optimizing the RK61 keyboard for an improved typing experience:
1. Disassemble Royal Kludge RK61

To perform the desired modifications on the Royal Kludge RK61 mechanical keyboard, a systematic disassembly of its individual components is imperative. This entails a series of steps aimed at dismantling the keyboard effectively, granting access to the pertinent parts.
To commence, the initial crucial step entails the removal of all keycaps from the keyboard. This action is pivotal as it facilitates improved access to the internal components of the keyboard, ensuring the modifications can be executed with utmost efficiency.
Following the keycap removal, the subsequent step involves opening the RK61 keyboard case. Typically, this can be achieved by disengaging the various screws that secure the case together, although the exact process might vary based on the keyboard’s specific model and design.
Upon the successful opening of the keyboard case, the subsequent action is to access the PCB connector that interfaces with the battery. Typically located on the keyboard’s underside, this step necessitates a degree of caution and precision to ensure safe opening without causing damage to the keyboard or its internal components.
In conclusion, though the process of disassembling the Royal Kludge RK61 mechanical keyboard may appear daunting initially, meticulous adherence to these steps ensures the successful execution of modifications, resulting in a fully customized and optimized keyboard experience.
Step 1: Desoldering All Switches From Mechanical Keyboard Royal Kludge RK61

To efficiently desolder the RK61 PCB switch, you’ll require a set of essential tools, primarily a soldering iron and a solder sucker. Armed with these tools, you can follow a precise sequence of steps to ensure the successful removal of the switches.
Commence by applying heat to the lead connecting the switch pin and PCB using the soldering iron. Once the lead reaches an adequate temperature, proceed to melt the solder securing the switch in position. Exercise precision and caution during this critical step, as excessive heat or force can potentially harm the switch.
After successfully liquefying the solder that secures the switch, promptly employ the solder sucker to extract the molten solder from the area. This step is pivotal in guaranteeing the efficient desoldering of the switch from the PCB, as any residual solder can pose complications when installing a new switch.
It’s imperative to replicate these actions for all 61 RK61 switches, as this serves as a crucial preparatory phase before advancing to the subsequent stage of the process, which entails lubricating the switches. By dedicating the necessary time to diligently desolder each switch, you can ensure that your RK61 PCB is primed for the ensuing steps, ultimately leading to optimal outcomes when modifying or repairing your keyboard.
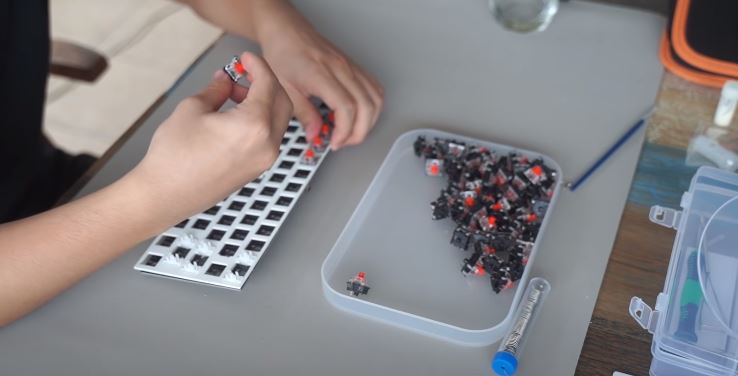
Step 2: Remove all the switches from PCB using the switch puller or your hands.

After successfully desoldering all the switches, the next step involves removing these switches from the printed circuit board (PCB). There are two primary methods to achieve this: using a switch puller or manually extracting each switch by hand.
If you opt for a switch puller, exercise caution to prevent any damage to the PCB or the switches. Carefully position the switch puller around each switch, ensuring a secure grip, and gently squeeze to secure it in place. Once you are confident in the grip, apply slight pressure to safely detach the switch from the board.
On the other hand, if you prefer to remove the switches manually, take care to prevent any harm to the PCB or the switches themselves. This approach may involve using your fingers or a small tool to gently pry each switch away from the board until it becomes loose enough to be completely removed.
Regardless of your chosen method, patience and precision are key throughout the process to avoid any potential mishaps or accidents. By being meticulous and deliberate, you can ensure the switches are safely and effectively removed from the PCB without causing harm to the board or other surrounding components.
Step 3: Remove all the switches from PCB using the switch puller or your hands

To simplify the process of modifying and applying lubrication to the stabilizers on the keyboard plate, it’s advisable to detach all stabilizers connected to the plate. This facilitates better access to the stabilizers, making it more convenient to carry out essential maintenance or upgrades.
Apart from improved accessibility, removing the stabilizers also enables thorough cleaning and lubrication, ultimately enhancing the keyboard’s overall performance and lifespan. This meticulous approach to stabilizer maintenance serves as a preventive measure, reducing the risk of future problems or malfunctions and ensuring that the keyboard consistently operates at its best.
2. Lube The RK61 Switches

Lubricating mechanical keyboard switches can be a meticulous process that demands a significant investment of time and precision. For instance, if you own an RK61 keyboard, allocating a substantial portion of your day, approximately 2-3 hours, is necessary to ensure the thorough lubrication of all 61 switches.
Commencing the process, you will require a switch opener to access the various components of each switch. Once the switch is open, the lubrication process involves treating each individual part, including the Bottom Housing, Spring, Stem, and Top Housing switch. The application of lubricant to these components serves to mitigate friction, reduce noise, and enhance the overall typing experience.
Upon successfully lubricating all the individual parts, the subsequent step involves meticulously reassembling the switch by correctly reinstating all components in their proper order. While this task may require careful handling, it is pivotal to ensure the switch’s flawless functionality.
Ultimately, the above-described three-step procedure must be replicated for all 61 switches on your keyboard. Although time-intensive, the end result will yield a smoother, quieter, and more gratifying typing experience. With diligence and a keen eye for detail, you can achieve optimal lubrication for your keyboard switches.
3. Mod And Lube RK61 Stabilizers
To minimize unwanted vibrations and muffle keypress sounds effectively, specific adjustments to the RK61 keyboard stabilizers and the application of appropriate lubrication are essential. Achieving these enhancements involves a precise sequence of actions:
- Identifying the Stabilizer Components: Start by recognizing the stabilizer elements that require attention. This step sets the stage for targeted improvements.
- Carefully Removing Components: Gently detach these identified stabilizer components from the keyboard. Exercise care during this process to prevent any damage.
- Uniform Lubrication Application: Apply lubricant evenly and thoroughly to the relevant stabilizer components. Proper lubrication helps reduce friction and noise, enhancing the typing experience.
- Precise Component Reattachment: Reattach the modified stabilizer components with precision and secure them firmly in place. This step ensures the stabilizers function optimally.
By following these steps meticulously, you can effectively enhance your keyboard’s stabilizers, reducing keypress noise and creating a more comfortable and less distracting typing environment. If you require further guidance on how to modify stabilizers in a mechanical keyboard, consider referring to our comprehensive article, “How to Mod Stabilizers: Band-Aid, Clip, and Lube: Step By Step.”
Step 1: Disassemble all stabilizer components

To access all stabilizer components, you should disconnect the hook connecting the iron rod to its housing. This step must be repeated for each stabilizer in use.
This action grants complete access to all stabilizer parts, facilitating any required maintenance or adjustments. Properly opening all stabilizers is also crucial for preventing potential malfunctions or accidents resulting from inadequate maintenance or neglect. Thus, it is imperative to meticulously follow these instructions to ensure the stabilizers’ proper functionality and extend the equipment’s lifespan.
Step 2: Clip The Plastic Rectangle on the stabilizer housing

Inside each stabilizer housing, you will find two rectangular components that require clipping. The goal here is to eliminate any potential wobbling or vibrations that might occur when you press the stabilizer button. It’s especially important to perform this clipping on the spacebar stabilizer, as it tends to exhibit more frequent vibrations when pressed. If you’re feeling unsure or confused about the clipping procedure, we strongly advise you to take a moment to read our informative article on stabilizer modification.
Step 3: Lube The Stabilizer

To ensure the stabilizer housing performs optimally and lasts long, it’s vital to implement proper care and maintenance. One effective measure is the application of lubrication, which reduces friction and enhances the smooth operation of the housing. However, it’s crucial to note that not all parts of the housing require lubrication, as excessive lubrication can potentially harm performance.
In the case of the iron rod within the stabilizer housing, it’s recommended to use a high-quality lubricant like Super Lube. Applying this lubricant to the iron rod significantly minimizes friction between the rod and the plastic housing. This can have a substantial positive impact on the overall performance and smoothness of the stabilizer housing, allowing it to operate at its peak efficiency.
It’s essential to stress that employing correct lubrication techniques and using suitable materials are paramount for the proper functioning of the stabilizer housing. Over-lubrication, under-lubrication, or the use of low-quality lubricants can have detrimental effects on the housing’s performance and lifespan. Therefore, careful consideration of each component’s lubrication requirements and the use of appropriate materials and methods are crucial to ensure optimal performance and durability.
4. Reinstall The RK61 Stabilizers and Switches
Completing this task is remarkably uncomplicated and demands very little time or effort. To begin, simply insert the stabilizer into the plate, a step that can be effortlessly accomplished. Subsequently, proceed to reattach the keyboard switch to the printed circuit board (PCB), a process equally straightforward and achievable with just a few swift and easy steps.
Following the completion of these two actions, your keyboard will be primed for use and expected to operate seamlessly. These straightforward instructions ensure that anyone, regardless of their level of electronics experience, can adeptly install a stabilizer and reattach the keyboard switch.
5. Solder The Switches Into PCB

To effectively complete the PCB assembly, soldering all the switches onto it is a critical step. While it may seem challenging at first, adopting the right approach and techniques can turn it into a seamless process. To enhance your soldering skills and ensure proficiency in attaching switches to the PCB, watching tutorial videos can be extremely beneficial. These videos provide step-by-step instructions and visual demonstrations that offer valuable insights into the best practices for soldering switches onto a PCB. As you gain more expertise in this technique, you’ll attain higher levels of precision and efficiency in your assembly work, resulting in a more professional and dependable final product.
6. Installing the foam into the RK61 keyboard case

By introducing foam into the keyboard casing, the primary aim is to attenuate the noise generated during typing and mitigate any undesirable reverberations emanating from the keyboard. This process cultivates a more subdued and refined typing encounter, allowing users to engage in typing without causing disturbances to those in their vicinity. With the incorporation of foam, the keyboard’s acoustic profile undergoes a transformation, yielding a richer and more melodious sound that is pleasing to the auditory senses.
Nonetheless, it is imperative to ensure that the foam is installed with precision, leaving an aperture for the screw, simplifying the installation of the PCB while safeguarding the keyboard’s overall functionality. Thus, exercising due diligence during the foam installation process ensures a harmonious and delightful typing experience while preserving the keyboard’s operational integrity.
7. Put all components back into the Keyboard Case

It’s essential to perform a thorough check to ensure the proper connection of the battery cable to the RK61 PCB before advancing to the subsequent phase of assembling the keyboard. This task is fairly straightforward, primarily involving the installation of the PCB into the keyboard case. By dedicating a moment to confirm the secure connection of the battery cable, you can preemptively avert any possible future issues, thereby ensuring the consistent and dependable operation of your keyboard. Hence, we strongly advocate for prioritizing this step with meticulous attention and care to ensure a seamless progression in the keyboard assembly process.
8. Replacing Keycaps

Upgrading your keyboard’s keycaps can profoundly enhance the tactile and auditory aspects of your typing experience. One effective approach involves opting for keycaps crafted from premium-grade plastic materials that adeptly dampen keystroke noise. Specifically, selecting a thicker keycap set can significantly reduce sound levels, ultimately resulting in a more delightful and satisfying typing experience.
When it comes to choosing the perfect keycaps for your keyboard, it’s paramount to prioritize sets fashioned from top-tier materials that prioritize user comfort. For instance, consider the Coral Sea Keycaps set—a stellar choice for individuals seeking high-quality PBT plastic keycaps with a textured surface, ensuring extended comfort during prolonged usage. Furthermore, this set showcases an OEM profile, catering to the needs of both typists and gamers alike.
In this article, we also provide tailored recommendations for keycap sets specifically designed to complement Royal Kludge mechanical keyboards. So, whether your goal is to refine sound quality, tactile feedback, or overall performance, embarking on a keycap upgrade journey serves as an excellent starting point for keyboard enthusiasts.
Recommended Upgrades for RK61 Keyboard
When it comes to optimizing your RK61 keyboard, there are several highly recommended upgrades to consider:
- Keycaps:
- Upgrading your keycaps to higher-quality ones can significantly elevate both the aesthetics and tactile experience of your keyboard. Some popular choices include PBT keycaps, Double-Shot keycaps, or custom-designed keycaps.
- Switches:
- Enhance your typing experience by replacing the stock switches with higher-end mechanical switches. While Cherry MX switches remain a popular choice, explore a diverse range of options such as Kailh Box switches, Gateron switches, and more for a customized feel.
- Stabilizers:
- Address the potential rattling and inconsistency in the RK61 keyboard’s stabilizers. Upgrading to better-quality stabilizers or engaging in modding can significantly reduce the rattle and provide an overall improved typing experience.
- Case:
- Elevate the visual appeal and tactile satisfaction of your keyboard by considering a case change. Options like a metal or wooden case can impart a premium and distinctive feel to your setup.
- Cable:
- Add a touch of personalization and style by upgrading your keyboard cable. Choices such as a coiled cable or a paracord cable can enhance the uniqueness of your keyboard while maintaining functionality.
It’s important to note that these upgrades are not mandatory, as the RK61 keyboard performs admirably without modifications. However, should you choose to pursue these enhancements, you can tailor your keyboard to meet your specific preferences, resulting in a more personalized and premium typing experience.
Maintenance and Care Tips for RK61 Keyboard
1. Regular Cleaning:
- To maintain your RK61 Keyboard’s longevity and performance, conduct regular cleaning.
- Utilize a soft-bristled brush or a microfiber cloth to delicately remove dust and debris that may accumulate over time.
- Avoid employing harsh chemicals or water, as these substances can potentially harm the keyboard.
2. Spill Prevention:
- Safeguard your keyboard against liquid exposure, as spills can inflict irreparable damage to the internal components.
- In case of a spill, promptly disconnect the keyboard and gently cleanse the affected area with a damp cloth.
3. Proper Storage:
- When the keyboard is not in use, store it in a dry, cool environment to shield it from moisture and extreme temperatures.
4. Avoid Physical Impact:
- Protect your keyboard from physical harm by refraining from dropping or striking it, as such actions can result in significant damage to its internal components.
5. Utilize a Protective Cover:
- Consider employing a keyboard cover to shield it from dust, spills, and scratches, ensuring long-lasting durability.
6. Keep Software Up-to-Date:
- Maintain your keyboard’s software by regularly checking for driver updates on the manufacturer’s website. This practice ensures optimal performance and compatibility.
7. Use as Intended:
- Operate the keyboard for its intended purpose, avoiding any unauthorized modifications or alterations that may compromise its functionality and structural integrity.
By adhering to these recommendations, you can prolong the RK61 Keyboard’s lifespan while maintaining peak performance throughout its usage.
Conclusion
In summary, the process of upgrading the Royal Kludge RK61 to a premium keyboard proves to be straightforward and accessible to anyone. By applying techniques such as lubricating the switches, modifying and lubricating the stabilizers, introducing foam into the keyboard case, and replacing keycaps, you can effortlessly elevate your keyboard’s quality, resulting in a highly satisfying typing experience. These upgrades offer notable advantages, including reduced noise levels, smoother keystrokes, and an improved ergonomic typing angle. Whether you’re a dedicated gamer, a prolific writer, or simply someone who spends significant time typing, enhancing your RK61 will undoubtedly elevate your overall user experience and provide the feel of a premium keyboard.
Kizaru is a fan, collector, and has a huge addiction to mechanical keyboards. Kizaru has a collection of dozens of mechanical keyboards that come in different sizes and use different switches. He also frequently contributes to various forums that discuss keyboards such as Reddit and GeekHack.
