
Last Updated on November 23, 2023
Have you ever found yourself frustrated by a keyboard switch that doesn’t feel as smooth when you click it? This common issue can significantly impact your typing experience, but fear not – there are practical steps you can take to address this problem and restore the smooth functionality of your switch.
Why Your Switch Doesn’t Feel Smooth When You Click It?
The sensation of a switch not feeling smooth when clicked is often attributed to the presence of dirt, dust, or debris inside the switch mechanism. These tiny particles can create friction and resistance, leading to the unpleasant tactile experience you’re encountering. However, there’s no need to worry – you can tackle this issue with a few straightforward steps.
Step-by-Step Solution Guide
Step 1: Disconnect and Prepare
Ensuring your safety is paramount before embarking on troubleshooting your non-smooth switch click. Follow these steps to kickstart the process:
1. Unplug Your Keyboard:
Begin by disconnecting your keyboard from your computer or device. This precaution prevents any inadvertent keystrokes or potential electronic mishaps while you’re working on the switch.
2. Create a Safe Workspace:
Choose a clean and well-lit workspace where you can comfortably focus on the task at hand. Clear any clutter that might obstruct your access to the keyboard’s switch area.
3. Gather Necessary Tools:
Before you proceed, ensure you have the required tools at your disposal. You’ll need a small screwdriver, a keycap puller (if available), and a container to hold screws and small components during disassembly.
4. Approach with Caution:
With your workspace set up, approach the keyboard with caution. Handle it gently and avoid unnecessary pressure or force, as keyboards can be delicate electronic devices.
5. Remove the Keycap:
Carefully lift the keycap covering the problematic switch. If you’re using a keycap puller, insert it beneath the keycap and gently lift it off. If not, use your fingers to carefully lift the keycap, applying even pressure on both sides.
By meticulously following these steps, you’ll create a safe environment and gain access to the inner workings of the switch, setting the stage for effective troubleshooting and resolution.
Step 2: Gentle Cleaning with Compressed Air or a Brush
Switches that feel rough or unresponsive often suffer from the accumulation of dirt and debris. To restore their smoothness, you can employ the following method of gentle cleaning using either compressed air or a soft brush.
Materials Needed:
- Compressed air canister
- Soft bristle brush
Instructions:
- Safety First: Before you start, ensure that your keyboard is disconnected from your computer or device. This precautionary measure prevents accidental key presses or electrical mishaps during the cleaning process.
- Positioning: Hold your keyboard with the switch that requires cleaning facing downward. This orientation prevents any dislodged debris from falling deeper into the switch mechanism.
- Compressed Air Method:
- If you’re using compressed air, take the canister and carefully aim the nozzle at the switch you’re cleaning.
- Gently press the trigger to release short bursts of compressed air into the switch. The air pressure should be sufficient to dislodge any particles without causing damage.
- Move the canister’s nozzle around the switch to ensure thorough cleaning. Pay attention to different angles to reach all sides of the switch.
- Brush Method:
- If you’re using a brush, ensure that it has soft bristles to avoid scratching or damaging the delicate components of the switch.
- Holding the brush at a slight angle, gently sweep the bristles across the switch’s surface. Use light, controlled motions to dislodge and remove any dirt or debris.
- Be patient and thorough, making sure to cover all areas of the switch. You can also use the brush to sweep around the edges of the switch to catch any particles trapped there.
- Inspect and Repeat: After cleaning, take a moment to inspect the switch and surrounding area. If necessary, you can repeat the process to ensure that all debris has been effectively removed.
- Allow Time to Settle: If you’ve used compressed air, give the keyboard a moment to allow any dislodged particles to settle. You can gently tap the keyboard on its sides to encourage debris to fall out.
- Reconnect and Test: Once you’re satisfied with the cleaning process, reconnect your keyboard to your computer or device. Test the switch by pressing it multiple times to assess its smoothness and responsiveness.
By choosing either the compressed air or brush method, you’ve taken an important step in addressing the rough feel of your switch. Remember, the key here is to be gentle to avoid causing any damage to the sensitive components within the switch mechanism. If the issue persists, proceed to the next step of the troubleshooting process to further enhance the smoothness of your switch clicks.
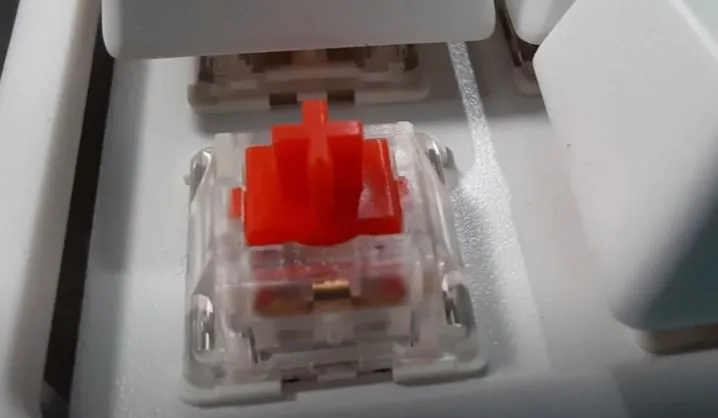
Step 3: Lubrication for Smoother Functionality
If you’ve completed the cleaning process and your switch is still lacking that desired smoothness, it’s time to introduce a crucial element: switch lubrication. Switch lubricants are purpose-built to diminish friction and promote the seamless movement of the switch mechanism. Here’s a step-by-step guide on how to proceed with this essential task:
1. Obtain High-Quality Switch Lubricant
Start by acquiring a reputable and high-quality switch lubricant. You can find a variety of options available for purchase online or at electronics stores. It’s crucial to invest in a lubricant specifically designed for switches to ensure optimal performance and longevity.
2. Precise Application
With your chosen lubricant in hand, it’s time to apply it to the interior of the switch. Exercise precision and caution during this step to ensure that the lubricant is distributed evenly. Too much lubricant can lead to oversaturation and potential issues, so a little goes a long way. Follow these steps:
- Use a fine-tipped applicator or a precision brush to apply a small amount of lubricant to the contact points and moving parts within the switch.
- Ensure that the lubricant is spread uniformly across the components. Take your time to guarantee that every relevant part is covered.
3. Distribute Through Movement
To maximize the effectiveness of the lubricant and achieve the desired smoothness, engage in a gentle yet purposeful series of switch presses. This action facilitates the distribution of the lubricant across all moving parts, ensuring that friction is significantly reduced. Follow these instructions:
- Slowly and gently press the switch multiple times. Pay attention to the feel and movement, noting any improvements in smoothness.
- The goal is to encourage the lubricant to coat the internal components thoroughly. Continue pressing until you sense that the switch’s operation has become notably smoother.
4. Fine-Tuning
After distributing the lubricant through movement, evaluate the switch’s performance. If it still doesn’t meet your expectations of smoothness, you can repeat the lubrication process, taking care not to overapply. Remember, achieving the perfect balance of lubrication is essential for optimal switch functionality.
5. Allow Time for Settling
Once you’re satisfied with the lubrication process, allow a brief period for the lubricant to settle and fully integrate with the switch’s components. This settling time ensures that the lubricant’s benefits are maximized and that you experience a consistent and reliable smoothness over the long term.
By meticulously following these steps, you’ll harness the power of switch lubrication to transform your keyboard’s performance. The reduction in friction and enhanced smoothness will contribute to a more enjoyable and efficient typing experience, making your keyboard a pleasure to use.
Step 4: Reassemble and Test
- Retrieve the Keycap: Begin by picking up the keycap that you carefully removed earlier in the troubleshooting process. Ensure that it is free from any dirt or debris that might have accumulated during the cleaning and lubrication steps.
- Alignment is Key: Take a moment to examine the switch stem and the underside of the keycap. You’ll notice that they have specific shapes that fit together perfectly. Align the keycap precisely with the switch stem, ensuring that any alignment markers or guides are matched.
- The Gentle Press: With the keycap aligned, apply gentle and even pressure directly above the switch stem. Slowly press down until you feel or hear a satisfying click. This indicates that the keycap is securely attached to the switch. Avoid using excessive force, as it may lead to damage or misalignment.
- Test with Confidence: Now that the keycap is securely in place, it’s time to put the switch to the test. Position your fingers comfortably over the key and press it multiple times. Pay close attention to the sensation of the switch click and the level of smoothness you experience. Compare this to how the switch felt before the troubleshooting process.
- Assess Responsiveness: As you press the key, evaluate its responsiveness. Does it register each press accurately? Is there a noticeable improvement in the smoothness of the click? Take your time during this testing phase to ensure you’re getting the desired results.
- Repeat for Assurance: To be thorough, repeat the testing process a few more times. Press the key in different areas and with varying amounts of force. This will provide a comprehensive assessment of the switch’s functionality and smoothness.
- Final Observations: Reflect on your testing experience. If the switch now feels smoother, more responsive, and provides a satisfying click, you’ve successfully reassembled and tested it. Congratulations on your meticulous troubleshooting efforts!
- Adjustments if Necessary: Should you find that the switch still doesn’t meet your expectations, you may consider gently removing the keycap and repeating the alignment and reassembly steps. It’s possible that a slight adjustment could make a significant difference in the switch’s performance.
- Celebrate Your Success: Once you’re satisfied with the results of the testing phase, take a moment to appreciate your accomplishment. You’ve successfully addressed the issue of a non-smooth switch click, and your keyboard’s performance is now optimized for a smoother and more enjoyable typing experience.
- Proceed with Caution: If, despite your best efforts, the switch remains unsatisfactory, or if you encounter any difficulties during the reassembly and testing process, it’s advisable to seek assistance from a professional technician. They have the expertise to diagnose and address more complex issues, ensuring the continued functionality of your keyboard.
By diligently following these step-by-step instructions for reassembling and testing the switch, you can ensure that your keyboard’s keycap is securely attached and that the switch itself is functioning smoothly and responsively. Your commitment to this process reflects your dedication to maintaining an optimal typing experience.
Additional Tips and Considerations for a Smooth Switch Click
Preventive Measures: Shielding with a Keyboard Cover
- Obtain a Keyboard Cover: Purchase a suitable keyboard cover designed to fit your keyboard model. Keyboard covers are available in various sizes and materials.
- Cover During Inactivity: Whenever you’re not using your keyboard, diligently place the keyboard cover over it. This protective barrier will shield your keyboard from dust, dirt, and other particles that could potentially infiltrate the switch mechanism.
- Minimize Exposure: Store your keyboard in a clean and dust-free area to further reduce the chances of debris finding its way into the switches.
Regular Maintenance for Consistent Smoothness
- Establish a Cleaning Schedule: Set a routine schedule for cleaning your keyboard. Aim for at least once a month, or more frequently if you often use your keyboard in dusty environments.
- Switch Cleaning Technique: Follow the steps outlined earlier in this guide to clean the switches using compressed air or a soft brush. Regular cleaning prevents the accumulation of debris that can compromise smooth switch operation.
- Thorough Keycap Cleaning: Remove the keycaps periodically and clean them individually. This ensures that no dirt or residue builds up on the keycaps, which could affect the overall feel of your keyboard.
- Mindful Wipe-Downs: Use a damp microfiber cloth to wipe down the surface of the keyboard, removing fingerprints, oils, and any surface dust. Ensure the keyboard is unplugged before cleaning.
Seeking Professional Assistance
- Evaluate Complexity: If you’ve diligently followed the troubleshooting steps provided in this guide and your switch still doesn’t feel smooth, it may be an indication of a more intricate issue within the switch mechanism.
- Research Trusted Technicians: Look for reputable professional technicians who specialize in keyboard repairs or electronics. Online reviews and recommendations can help you find a reliable expert.
- Explain the Issue: When reaching out to a technician, provide a detailed description of the problem you’re facing. Mention the steps you’ve already taken to troubleshoot and any observations you’ve made.
- Expert Diagnosis and Solution: Professional technicians have the expertise to diagnose complex switch-related problems accurately. They can recommend appropriate solutions, which may involve disassembling the keyboard and addressing internal issues.
Bonus Insights for an Optimal Typing Experience
Enhancing your typing experience goes beyond troubleshooting the non-smooth switch issue. Here are some bonus insights to elevate your keyboard usage:
Step 1: Embrace Ergonomic Enhancements
Upgrade your typing setup with an ergonomic keyboard to take your comfort to the next level. Ergonomic designs are meticulously crafted to support your natural hand and wrist positions, reducing strain and discomfort during extended typing sessions. Follow these steps to explore ergonomic enhancements:
- Research Ergonomic Keyboards: Look for ergonomic keyboard models that align with your preferences and typing habits. Research online reviews, user testimonials, and expert opinions to find the best fit for your needs.
- Test Ergonomic Varieties: Visit electronics stores or attend tech expos to try out different ergonomic keyboards. Experiment with various shapes, angles, and key placements to identify the design that resonates with your comfort requirements.
- Invest Wisely: Once you’ve found the ergonomic keyboard that suits you, make an informed investment. Consider factors such as build quality, additional features, and compatibility with your computer setup.
Step 2: Personalize with Custom Keycaps
The tactile sensation of typing can be greatly influenced by the keycaps you use. Custom keycaps offer the opportunity to tailor your keyboard’s feel and aesthetics to your liking. Follow these steps to explore the world of custom keycaps:
- Discover Keycap Materials: Research different keycap materials, such as ABS, PBT, and even specialized materials like resin or metal. Each material can provide a distinct texture and sound when typing.
- Explore Keycap Profiles: Different keycap profiles, like Cherry, SA, or DSA, offer unique shapes and heights that can affect how your fingers interact with the keys. Experiment with profiles to find the one that enhances your typing comfort.
- Choose Aesthetic Designs: Custom keycaps come in a plethora of designs, colors, and themes. Select keycaps that resonate with your personal style while ensuring they offer the desired typing experience.
Step 3: Experiment with Switch Varieties
If you consistently encounter typing discomfort with a particular switch type, exploring different switch varieties might be the solution. Mechanical, membrane, and hybrid switches each present their own typing characteristics. Here’s how to proceed:
- Research Switch Types: Learn about the different switch varieties available in the market. Understand the distinctions between mechanical switches, membrane switches, and hybrid switches, including their actuation force, key travel, and tactile feedback.
- Test and Compare: Obtain keyboards with various switch types for a hands-on comparison. Pay attention to how each type feels when typing, how much force is required to actuate a key, and the overall typing experience.
- Identify Your Preference: Through testing and comparison, you’ll likely discover a switch type that aligns best with your typing style and preferences. Once you’ve identified your preferred switch, consider incorporating it into your keyboard setup for a smoother and more satisfying typing experience.
By following these bonus insights, you can optimize your typing experience beyond the resolution of the non-smooth switch issue. Embracing ergonomic enhancements, customizing keycaps, and experimenting with different switch varieties all contribute to a more enjoyable and comfortable typing journey. Remember that everyone’s preferences are unique, so take the time to explore and find the combination that suits you best. With a keyboard tailored to your comfort and style, you’ll be well on your way to typing bliss.
Conclusion
A switch that doesn’t feel smooth when clicked can be a frustrating obstacle to your typing comfort. However, armed with the knowledge and steps provided in this guide, you can take proactive measures to address the issue and restore the smooth, satisfying tactile sensation you desire. By following the outlined troubleshooting steps, you can effectively banish dirt, dust, and debris from your switch mechanism and enjoy a seamless typing experience once again. Remember, a little maintenance goes a long way in ensuring the longevity and performance of your beloved keyboard.
FAQs
Why does my switch feel rough when I press it?
The rough sensation is often caused by dirt, dust, or debris within the switch mechanism, resulting in friction and an unpleasant feel.
Can I fix this issue myself?
Absolutely! This guide provides step-by-step instructions to troubleshoot and resolve the problem, ensuring smoother switch clicks.
Is it safe to use compressed air or a brush on my keyboard?
Yes, as long as you follow the instructions carefully and use gentle techniques, it’s safe to clean your keyboard with compressed air or a brush.
How do I choose the right switch lubricant?
Look for high-quality switch lubricants designed for keyboards. Reputable brands and reviews can help guide your selection.
What if my switch still doesn’t feel smooth after cleaning and lubrication?
If the issue persists, consider seeking help from a professional technician who specializes in keyboard repair.
Can I prevent this issue from happening again?
Yes, routine maintenance, using a keyboard cover, and exploring ergonomic enhancements are effective ways to prevent future switch roughness.
Kizaru is a fan, collector, and has a huge addiction to mechanical keyboards. Kizaru has a collection of dozens of mechanical keyboards that come in different sizes and use different switches. He also frequently contributes to various forums that discuss keyboards such as Reddit and GeekHack.
