
Last Updated on December 4, 2023
Are you a proud owner of a 60% keyboard, intrigued by its sleek design and compact layout, but find yourself missing the familiar arrow keys? You’re not alone. These nifty keyboards offer convenience and portability, but their space-saving nature often means sacrificing dedicated arrow keys. Fear not, for in this guide, we unveil a comprehensive set of strategies to help you seamlessly navigate your 60% keyboard using arrow keys. Whether you’re a productivity enthusiast, a coder, or simply a curious user, our in-depth exploration will equip you with the know-how to master arrow key usage on these innovative keyboards.
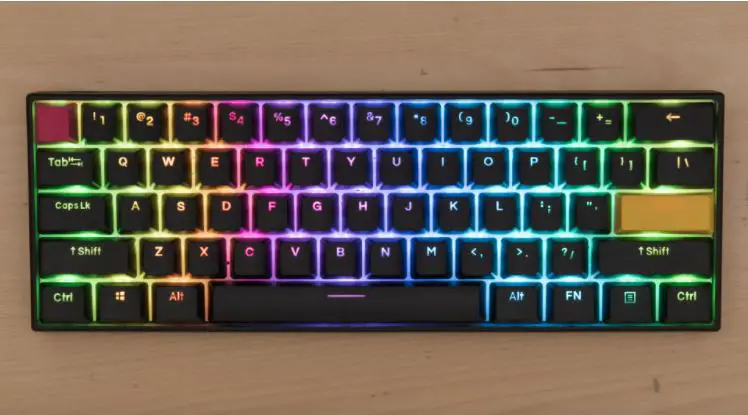
How To Use Arrow Keys on a 60 Keyboard
1. Using Dedicated Arrow Keys: Simplified Navigation
For users who prioritize simplicity and convenience, dedicated arrow keys on a 60% keyboard offer an immediate solution to navigation challenges. These keyboards, often designed with specific arrow keys, can significantly enhance your typing experience, especially if arrow key usage is a regular part of your workflow.
The Convenience of Built-in Arrow Keys
Certain 60% keyboard models come pre-equipped with dedicated arrow keys, strategically positioned for easy access. These keys mirror the layout of traditional keyboards, eliminating the need for intricate key combinations or layer adjustments to access arrow functions. With these keys at your fingertips, tasks like text selection, cursor movement, and navigation through documents become effortless.
Key Considerations Before Purchasing
Before committing to a keyboard solely for its dedicated arrow keys, there are important factors to consider:
- Placement: Pay attention to the placement of dedicated arrow keys. They should be intuitively located without requiring awkward hand positioning. A well-positioned arrow key cluster ensures smooth and natural navigation.
- Size and Comfort: Evaluate the size of the dedicated arrow keys. Oversized or undersized keys can lead to mistyped commands and hinder your typing flow. Look for a keyboard model that strikes the right balance between key size and overall comfort.
- Build Quality: The quality of the keys themselves matters. Opt for a keyboard that offers tactile feedback and durability. Responsive keys enhance your typing experience and reduce the chances of accidental presses.
- Customizability: Some keyboards allow you to customize the functions of dedicated arrow keys to match your preferences. This flexibility can further optimize your navigation experience.
The Verdict: A Seamless Navigation Solution
Incorporating dedicated arrow keys into a 60% keyboard eliminates the need for additional layers or complex key combinations. This feature enhances productivity by streamlining navigation tasks and offering a familiar layout. However, before making your final decision, ensure that the keyboard’s dedicated arrow keys are thoughtfully placed, appropriately sized, and conducive to your comfort and workflow. With the right keyboard in hand, you can navigate documents, websites, and applications seamlessly, just as you would with a full-sized keyboard.
2. Leveraging Dual-Function Keys for Efficient Navigation
The compact nature of 60% keyboards demands creative solutions to incorporate essential features while maintaining a streamlined layout. One ingenious approach is the integration of dual-function keys. These keys serve a dual purpose, executing two different functions or registering distinct keystrokes based on how they are activated. While this concept might initially appear intricate, it presents an adaptable and ingenious method to incorporate arrow keys without compromising space.
Manufacturers may adopt varying terminology for this feature. One prevalent implementation is known as Tap Mode. In this mode, specific keys seamlessly transition between acting as arrow keys when tapped momentarily and performing alternate tasks when held down for an extended duration. Although becoming proficient in utilizing this technique may necessitate practice, the rewards in terms of enhanced efficiency and expanded functionality are well worth the investment.
To harness the full potential of dual-function keys, manufacturers frequently provide software tools for customization. This software empowers users to fine-tune the behavior of these keys according to their unique preferences. For example, you can modify the duration threshold required for a tap to register as a press, thereby aligning the functionality with your typing speed and style. While there might be an initial learning curve, the adaptability and supplementary functions offered by dual-function keys significantly enhance the overall typing experience.
Customization through Software
Dual-function keys’ effectiveness is amplified by the inclusion of software that facilitates personalization. By accessing manufacturer-provided software, users can unlock a realm of possibilities to tailor these keys to their exact requirements. This software often features an intuitive interface that allows users to define and modify the behavior of dual-function keys.
Adjusting the Tap Duration Threshold
A noteworthy aspect of dual-function keys’ customization is the ability to adjust the tap duration threshold. This parameter determines how quickly a tap transitions into a press, activating the secondary function. By fine-tuning this threshold, users can ensure that the keys respond accurately and seamlessly to their typing patterns. This level of granular control permits a highly individualized typing experience that adapts to the user’s specific needs.
Learning Curve and Benefits
Embracing the use of dual-function keys may involve a brief learning curve. As with any novel feature, acclimatization requires practice and familiarity. However, the dividends of this investment are substantial. The expanded functionality brought about by dual-function keys can optimize workflow efficiency, making tasks smoother and more intuitive.
Considerations for Optimal Usage
To make the most of dual-function keys, consider the following tips:
- Practice: Spend time acclimating to the dual-function key behavior. Engage in typing exercises and routine tasks to enhance your familiarity with this feature.
- Customize Wisely: Utilize the customization software to tailor the dual-function keys to your typing speed and habits. Experiment with different tap duration thresholds to find the optimal balance.
- Balance between Speed and Accuracy: Strive to strike a balance between tap duration and accuracy. While setting a shorter tap duration might enhance speed, it should not compromise the accuracy of key activation.
- Explore Additional Functions: Beyond arrow key functionality, explore other secondary functions that dual-function keys offer. Depending on your keyboard layout and software capabilities, you might discover new shortcuts and commands that can expedite your tasks.
Dual-function keys exemplify innovation in compact keyboard design. By seamlessly blending arrow key functionality with secondary tasks, these keys provide a dynamic and space-efficient solution. While acclimatization and customization require some investment, the potential for enhanced productivity and versatility makes dual-function keys a valuable addition to the 60% keyboard landscape. As you explore this feature, remember that practice and fine-tuning are the keys to unlocking its full potential.
3. Navigating with Layer Keys: Mastering the Art of Virtual Arrow Keys
As we delve deeper into the realm of 60% keyboards, we encounter the ingenious concept of layer keys. These keys are the secret sauce that transforms a seemingly limited keyboard into a versatile tool capable of emulating full-sized functionality. If you’re ready to embark on a journey of mastering virtual arrow keys, layer keys are your ticket to a world of enhanced navigation.
The Concept of Layer Keys
Imagine layer keys as portals to an alternate keyboard reality. In this reality, keys that aren’t physically present on the compact 60% keyboard are magically summoned through the power of modifiers, with the Fn (Function) key often leading the charge. This approach shares similarities with keyboard shortcuts, a familiar concept to most users.
When you engage a layer key, a predefined set of keys adopts new roles, replicating the functions of those absent keys. For instance, pressing the Fn key in combination with other designated keys simulates the behavior of arrow keys. This means you can achieve directional navigation without the need for dedicated arrow keys. The result? A compact keyboard that rivals its larger counterparts in functionality.
Decoding the Layer Key Combinations
Manufacturers often adhere to a standardized schema for layer keys. These combinations are the key to unlocking the virtual arrow keys and other hidden functions. Here’s a common example:
- Fn + W: Up Arrow
- Fn + A: Left Arrow
- Fn + S: Down Arrow
- Fn + D: Right Arrow
By executing these combinations, you’re essentially sending commands to the keyboard’s microcontroller, which interprets your input as arrow key actions. While it might seem a tad complex at first, with practice, muscle memory kicks in, and you’ll find yourself instinctively triggering these combinations for seamless navigation.
The Flexibility of Customization
One of the most exciting aspects of layer keys is the potential for customization. Manufacturers often provide software interfaces that allow users to redefine layer key combinations according to their preferences. This means you can tailor your keyboard’s behavior to match your unique typing style and frequently used applications.
Imagine configuring Fn + Q for a specialized function in your favorite design software or Fn + E to replicate a commonly used keyboard shortcut in your coding environment. This level of customization puts you in the driver’s seat, ensuring that your keyboard adapts to your needs, rather than the other way around.
The Learning Curve and Benefits
Adopting layer keys does come with a learning curve. Training your fingers to execute specific combinations seamlessly takes time and practice. However, the payoff is substantial. Once you’ve acclimated to layer key navigation, you’ll enjoy the benefits of efficient arrow key access without the need for additional physical keys.
Layer keys are an investment in productivity. While the initial adjustment might require patience, the dividends are worth it. With practice, you’ll find that layer key navigation becomes second nature, and you’ll wonder how you ever navigated without it.
Layer keys are the key to unlocking the full potential of your 60% keyboard. By mastering these combinations, you gain access to a multitude of functions without cluttering your keyboard layout. The journey to proficiency may have its challenges, but the enhanced navigation capabilities, coupled with the personalized touch of customization, make the effort worthwhile.
As you navigate your digital landscape with finesse, you’ll realize that your compact 60% keyboard is not just a tool but a canvas for productivity artistry. With layer keys, you wield the power to redefine key functions, elevate your typing experience, and showcase the versatility of your keyboard to the world. So, embark on this adventure, and may your layer key exploits elevate your typing prowess to new heights.
4. Customizing Your Keyboard Setup: Remapping for Ultimate Personalization
If the previously mentioned options don’t align with your preferences, fret not – keyboard customization offers a comprehensive solution. Remapping your keyboard provides you with the ability to assign specific functions to keys or key combinations, regardless of their original design. While this approach demands a degree of technical proficiency and access to software tools, it opens the door to unparalleled levels of flexibility and personalization.
The Power of Remapping: Using PowerToys
One of the most popular tools for keyboard remapping is PowerToys, a utility designed to enhance the Windows user experience. With its user-friendly interface, PowerToys simplifies the complex task of remapping keys, making it accessible even to those without extensive technical knowledge.
Step-by-Step Guide to Remapping Your Keyboard using PowerToys:
- Download and Installation: Begin by downloading and installing PowerToys on your Windows system. This utility can be easily found online, and its installation process is straightforward.
- Access the Keyboard Manager Section: Once PowerToys is installed, open the application and navigate to the “Keyboard Manager” section. This is where the magic of key remapping happens.
- Adding a Key Remap: In the Keyboard Manager section, locate the option labeled “Remap a Key.” Click on this option to initiate the process of assigning new functions to your keys.
- Key Definition: To remap a specific key, click the “+” button. This prompts the addition of a new key remap entry. In this entry, you define the key you want to remap from its original function to a new one.
- Mapping Corresponding Function: In the “Mapped To” column of your newly created remap entry, define the function you want the key to perform. This could range from simulating an arrow key to executing a specific command.
- Save and Confirm: Once you’ve defined the key and its corresponding function, ensure to save your settings. Confirm the changes you’ve made.
Fine-Tuning and Practical Considerations
While remapping your keyboard offers a high degree of customization, it’s important to approach it with a strategic mindset. Here are some practical tips to consider:
- Trial and Error: Don’t be discouraged if your first remapped layout isn’t perfect. It might take some experimentation to find the arrangement that feels most intuitive and efficient for your workflow.
- Learning Curve: Just like any new skill, adapting to a remapped keyboard layout requires a learning curve. Be patient with yourself and give yourself time to adjust. Over time, your muscle memory will adapt.
- Balancing Familiarity and Innovation: While you’re free to remap keys in creative ways, it’s also important to maintain some degree of familiarity. Drastic changes might hinder your ability to use other systems or devices comfortably.
- Backup and Restore: Some remapping software allows you to create backup profiles. This is incredibly useful in case you need to switch between different setups or if you encounter compatibility issues.
- Community Resources: Online communities and forums often share remapping profiles and configurations. These can serve as a great starting point or inspiration for your own customization journey.
Remapping your keyboard takes customization to the next level, enabling you to tailor your typing experience precisely to your needs. With tools like PowerToys, the seemingly complex task becomes accessible, allowing you to redefine the functions of your keys and streamline your workflow. Remember, while the learning curve might be a challenge, the payoff is a keyboard that’s uniquely yours – optimized for your comfort and efficiency. Whether you’re a coding enthusiast, a writer, or a casual user, the power to transform your keyboard lies at your fingertips.
Advantages of Using a 60% Keyboard: Space-Saving Innovation
The realm of keyboards has witnessed a remarkable evolution, catering to the diverse needs of users. Among the various options available, the 60% keyboard has gained prominence for its innovative design and efficient layout. Despite its compact size, this keyboard type offers a range of advantages that make it a compelling choice for both casual users and professionals. In this comprehensive exploration, we delve into the multifaceted benefits of using a 60% keyboard.
1. Compact Size and Enhanced Ergonomics
The Power of Space Efficiency: The defining characteristic of a 60% keyboard is its compact form factor. By eliminating redundant keys and functions, these keyboards optimize desk space utilization. The result is a cleaner, clutter-free workspace that fosters productivity and concentration. With less keyboard real estate, you gain more room for other essential items, be it notes, reference materials, or even an aesthetically pleasing plant.
Ergonomic Brilliance: The reduced size of a 60% keyboard brings ergonomic advantages to the forefront. With the elimination of the numeric keypad and additional function keys, your mouse can nestle comfortably closer to the keyboard. This positioning promotes a more natural hand placement, reducing strain and potential discomfort during extended periods of use. Whether you’re a programmer engrossed in lines of code or a writer crafting prose, ergonomic comfort becomes an invaluable asset.
Access to the Mouse: A well-designed 60% keyboard encourages a workflow that seamlessly integrates keyboard and mouse interactions. The proximity of the mouse to the keyboard fosters a fluid transition between typing and pointing tasks. You’ll find yourself effortlessly toggling between keyboard shortcuts and mouse clicks, resulting in a rhythm that enhances efficiency and reduces cognitive load.
2. Customization Unleashed: Programmability
Empowerment Through Personalization: One of the most appealing features of many 60% keyboard models is their programmability. These keyboards provide users with the ability to customize key functions according to their preferences and workflow. The software or firmware accompanying these keyboards empowers you to redefine the purpose of each key, transforming the keyboard into a tailored tool that aligns with your unique needs.
Macro Magic: Programmability extends beyond simple key remapping. With the ability to create macros, you can automate complex sequences of actions with a single key press. Whether it’s a series of coding commands, repetitive data entry, or intricate Photoshop edits, macros streamline tasks and save you time and effort.
Enhanced Workflow: Imagine having dedicated keys for frequently used functions or applications. With a programmable 60% keyboard, this dream becomes a reality. You can assign specific keys to launch applications, trigger browser bookmarks, or even switch between workspaces, all without lifting your fingers from the keyboard. This level of customization elevates your workflow to new heights, transforming your keyboard into a command center.
3. Portability Redefined
The Nomad’s Companion: In a world where mobility is paramount, the portability of a 60% keyboard shines brightly. These keyboards are designed with the on-the-go user in mind. Their compact size allows them to slip effortlessly into laptop bags, backpacks, or even pockets. Whether you’re a digital nomad hopping between coffee shops or a frequent traveler needing a familiar keyboard setup, the 60% keyboard accommodates your mobility without compromise.
Remote Productivity: The ability to carry your preferred keyboard layout wherever you go amplifies your remote productivity. No longer confined to the laptop’s built-in keyboard, you can maintain a consistent typing experience across different devices. The familiarity of your custom key functions remains intact, ensuring a seamless transition from your home office to a remote workspace.
Eventual Desk De-Cluttering: The portability of a 60% keyboard can also lead to a curious phenomenon – desk minimalism. With the knowledge that your keyboard can accompany you anywhere, you might find yourself embracing the idea of a clean, organized workspace with fewer peripherals permanently stationed on your desk. This flexibility contributes to an environment that adapts to your needs, rather than dictating them.
The advantages of using a 60% keyboard extend far beyond its compact size. These innovative devices redefine the keyboard experience, offering ergonomic benefits, customization potential, and portability that cater to the modern user’s dynamic lifestyle. As you consider your keyboard options, ponder the synergy between space efficiency, personalization, and on-the-go versatility that the 60% keyboard brings to the table. Whether you’re a creative professional, a remote worker, or an avid typist, the 60% keyboard stands as a testament to the power of innovation in enhancing everyday interactions with technology.
Disadvantages of a 60% Keyboard
While the 60% keyboard offers a compact and efficient design, it’s important to consider the potential drawbacks that come with this form factor. Here are the key disadvantages to keep in mind:
1. Missing Keys
One of the most apparent disadvantages of the 60% keyboard is the absence of dedicated arrow keys and certain other functions that users are accustomed to having readily available. This absence can pose a challenge, particularly for tasks that heavily rely on arrow key navigation, such as editing documents, coding, or even simple web browsing. Without dedicated arrow keys, users must resort to alternative methods to achieve the same functionality.
In the absence of dedicated keys, users often turn to complex key combinations or layer keys. This approach requires pressing multiple keys simultaneously, which can be cumbersome and lead to slower typing speeds. Additionally, the reliance on key combinations might hinder the fluidity of tasks, especially for users who rely on arrow keys for quick and precise navigation.
2. Learning Curve
Adapting to a 60% keyboard layout can involve a significant learning curve, particularly for those who are accustomed to using larger keyboards with a full range of keys. The transition to a more compact layout requires users to develop new muscle memory and adjust their typing habits. This adjustment period can result in slower typing speeds and increased errors during the initial phases.
Users who frequently switch between different keyboard layouts might also face challenges in maintaining consistent muscle memory. This can be particularly frustrating for individuals who rely heavily on their keyboard for work or other tasks that demand accuracy and efficiency.
Moreover, the learning curve extends beyond navigation. The placement of frequently used keys, such as punctuation and function keys, might differ from what users are used to. This can lead to increased time spent searching for keys, interrupting the flow of work.
To mitigate the learning curve, users must invest time in practice and adaptation. While the learning process varies from person to person, it’s essential to acknowledge that becoming proficient with a 60% keyboard might take weeks or even months for some users.
While the 60% keyboard offers numerous advantages, including space-saving design and portability, it’s crucial to consider its limitations as well. The absence of dedicated arrow keys and the learning curve associated with adjusting to a compact layout are challenges that users must be prepared to address.
For individuals who prioritize efficiency and productivity in their keyboard usage, the initial inconvenience of the learning curve might be outweighed by the benefits of a streamlined setup. However, users should carefully assess their own typing habits, tasks, and preferences before committing to a 60% keyboard.
By weighing the advantages and disadvantages, users can make an informed decision about whether a 60% keyboard is the right fit for their specific needs. Those who are willing to invest time in adapting to the new layout can reap the benefits of a sleek and efficient keyboard that complements their workflow.
Conclusion
Navigating a 60% keyboard without dedicated arrow keys may seem challenging, but a variety of solutions are at your disposal. Whether you opt for dedicated keys, embrace dual-function keys, leverage layer keys, or embark on keyboard customization, the key is to find an approach that suits your typing style and workflow.
While each method comes with its learning curve, the payoff is enhanced efficiency and a customized typing experience. By mastering these techniques, you can maximize the potential of your 60% keyboard while ensuring seamless navigation through your tasks. Whether you’re a casual typist or a professional, a 60% keyboard can be a versatile and space-saving tool that adapts to your unique needs.
FAQs
What is a 60% keyboard?
A 60% keyboard is a compact mechanical keyboard that lacks the traditional number pad and some function keys, resulting in a smaller form factor. While it offers portability and space-saving advantages, it often lacks dedicated arrow keys.
How do I use arrow keys on a 60% keyboard without dedicated keys?
You can use alternative methods such as dual-function keys, layer keys, or keyboard remapping. These methods allow you to simulate arrow key functions through combinations of keys or key modifiers.
Are there 60% keyboard models with dedicated arrow keys?
Yes, some 60% keyboard models come with dedicated arrow keys. However, when choosing a model with dedicated keys, consider their placement and size to ensure an optimal typing experience.
What are dual-function keys on a 60% keyboard?
Dual-function keys are keys that perform two different functions or keystrokes depending on how they are engaged. For example, tapping a key might simulate an arrow key press, while holding it down longer could trigger another function. Manufacturers often provide software to customize this feature.
How do layer keys work on a 60% keyboard?
Layer keys involve combining a set of keys with a specific modifier, such as the Fn key, to simulate arrow key functions. By pressing the modifier key and designated keys, you can navigate in different directions. Layer keys are customizable and allow you to adapt the keyboard to your needs.
Can I customize the layout of a 60% keyboard?
Yes, you can customize the layout of a 60% keyboard through keyboard remapping. Using software tools like PowerToys, you can assign specific functions to keys or key combinations, tailoring the keyboard to your preferences.
Which method should I choose to use arrow keys on a 60% keyboard?
The choice depends on your personal preferences and typing habits. If you prefer dedicated keys, look for models with them. If you’re open to learning, dual-function keys and layer keys offer creative solutions. For advanced customization, consider keyboard remapping.
Is there a learning curve with these methods?
Yes, there might be a learning curve when adapting to new methods of using arrow keys. Dual-function keys and layer keys, in particular, require practice to become proficient. However, with consistent use, these methods can become intuitive.
Can I use these methods for other key functions as well?
Absolutely. Many of these methods can be applied to functions beyond arrow keys. Layer keys and keyboard remapping, for example, allow you to customize various key functions according to your needs.
Are there third-party applications for implementing these methods?
Yes, there are third-party applications like TouchCursor and StickShift that can assist with implementing these methods, especially if your keyboard doesn’t offer built-in support for them.
Are 60% keyboards suitable for all users?
While 60% keyboards offer advantages such as portability and space-saving, they might not be ideal for users who heavily rely on dedicated keys like the number pad. It’s important to consider your typing needs and preferences before choosing a keyboard model.
Can I switch between these methods on the same keyboard?
Yes, many 60% keyboard models allow you to use different methods simultaneously or switch between them based on your preferences. Customization options often make it possible to configure the keyboard to your liking.
Kizaru is a fan, collector, and has a huge addiction to mechanical keyboards. Kizaru has a collection of dozens of mechanical keyboards that come in different sizes and use different switches. He also frequently contributes to various forums that discuss keyboards such as Reddit and GeekHack.
